Here is my try to make this easy. I have gathered all the information I needed in order to get this set up.
Sign up up for AWS
- Go here http://aws.amazon.com/free/ and click the signup button. You will get one year for free if you chose a micro server EC2 instance(There is a limit on usage but as a development or test server it should be easy not to go over the limits).
- Log in with your normal Amazon account or create a new one.
- Go through the credit card step. You will not be charged but they will allocate $1 on your card to check that it is valid.
- Go through the rest of the steps including the call back. This is where Amazon prompts you with a code and asks you to enter your phone number. Just follow the instructions and you will get a phone call. Just say the numbers one by one and you will be signed up.
Now you have your AWS account created and we can begin to do the real work. We now need to get a server up and running.
Spin your free server up
At the top of the screen Hover above "My Account/Console". Click the link below:


Now find out which data center your server will be deployed in. Below the "Launch instance" button you will see something like this.


Now copy the AMI string(the blue link) from the right row.
Now click launch instance


In the next step we select the community AMIs tab and paste in the ami string in to the search field. If everything is right we are presented with only one server option.

Now click select.
On the next page keep the default settings and click continue.

Just click continue on the next step.


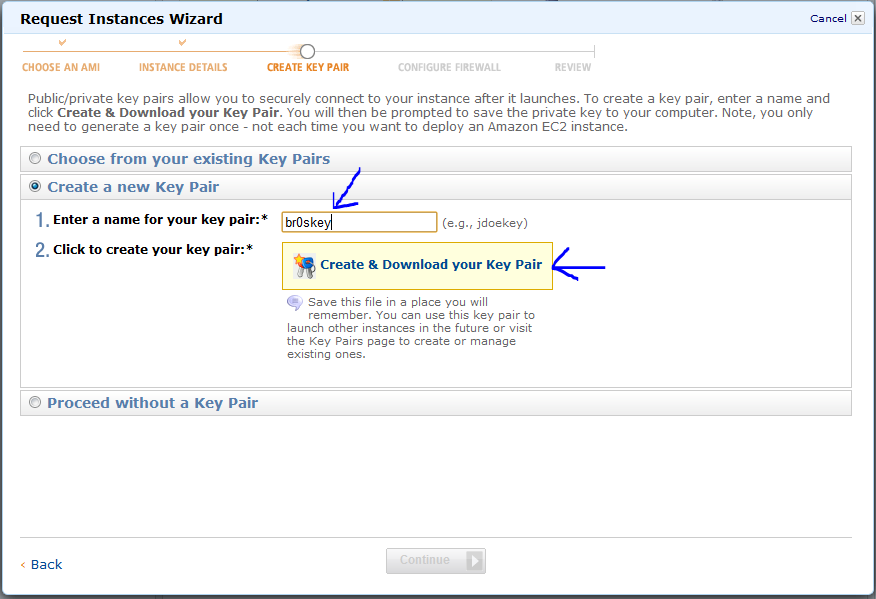
Make up a key name and put it in the text field like below.

The new server is launching and you can click close when prompted like below.


On the next page you will see a row for your newly deployed server. When the state is "running" we can proceed to try to connect to it via SSH.
Connect via PuTTY SSH
To be able start configuring your new server you need an SSH connection so you can run the necessary Linux commands to get the server to actually do something.
Now right click the green state icon saying running. It will pop up a menu. Select "connect".
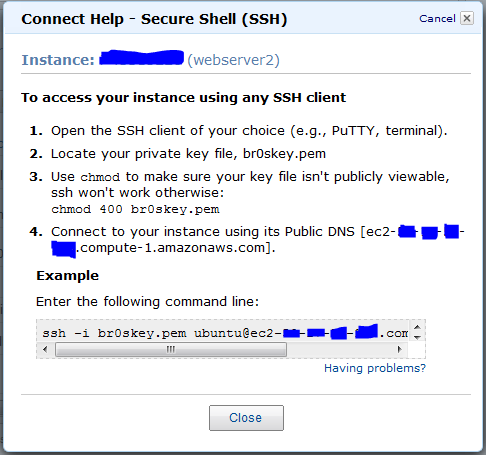
What you see in bullet number 4 above is the DNS name for your new server. That is what we are going to use to connect to the server via PuTTY. Copy the server name now(the square brackets are not part of the server name). The command line example in the picture is for Linux and will not work on Windows of course.
The first thing we need to do is open port 22 so that we have a way in for PuTTY.
Now click the "Security Group" option in the left menu.

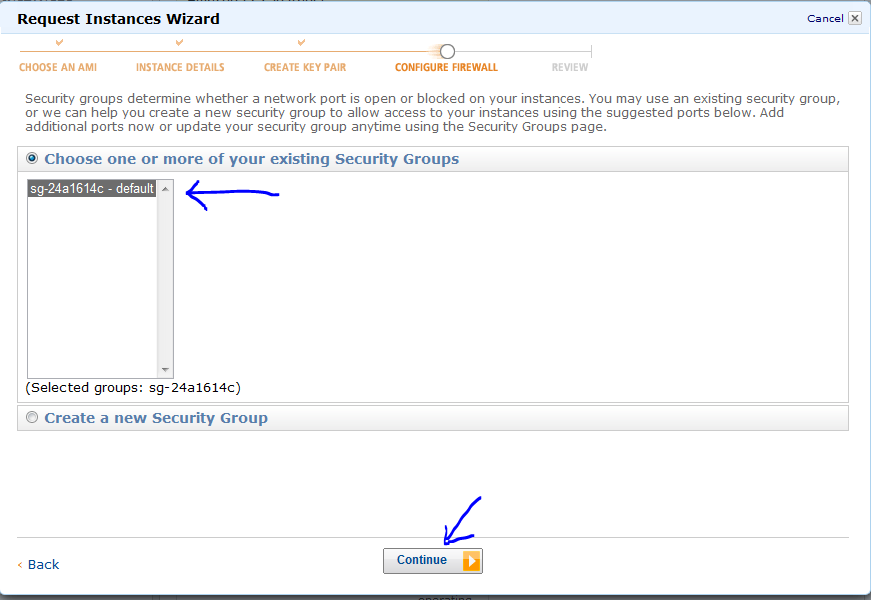
Tick the box next to the default security group. Select the inbound tab.
Select SSH from the "Create a new rule" list box.

Click the "Add Rule" button with the green cross.

We have now opened the firewall for inbound access from any ip-address on the Internet to all servers belonging to this security group. For us that means the server we just created.
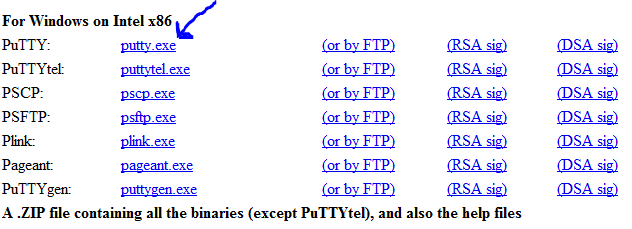
Now we need to install PuTTY.
Download PuTTY from here: http://www.chiark.greenend.org.uk/~sgtatham/putty/download.html

Remember the DNS name we copied from the AWS control panel? Now it is time to paste that in to the host name field in PuTTY.
Do also name your configuration in the field saved Sessions.
Click the save button. PuTTY should now look something like this:

Now set up the auto login name by navigating to Session->Connection->Data.
ubuntu is the default user name in the AMI we are using so let's put that user name in.

Now we need the the private key to be able to get PuTTY to login using it.
In order to get the private key we need the .pem file you downloaded before. Make sure you know where it is. The .pem key cannot be used directly in PuTTY so we need to run it through a tool that generates the private key.
You can find this tool here: http://www.chiark.greenend.org.uk/~sgtatham/putty/download.html

Start PuTTygen up just like you did with PuTTY.
Now click the load button and navigate to your .pem file.
When you are in the folder where you put the .pem file you will notice that it is not there in the file browser.
Important: Click the option "all files (*.*) in the select box in the lower right corner of the file browser.

You should be prompted with something like this:

Just click OK.
Now we are back in PuTTYgen and it should look something like this:

No click the button "Save private key". It will prompt you with this:

Click Yes and save the private key in a safe place.
We can now go back in to PuTTY.
Navigate to Session->Connection->SSH->Auth.
Click browse and navigate to your generated private key.
Important: Don't click the open button now!

Now go back to the top level "Session" in PuTTY.
Click save to save this configuration so the changes made are persistent and we can use this saved session the next time we need to connect to our new server.
Now click open.
This should open a new PuTTY window and log you in without you having to enter a password.
Wow that was a lot of screenshots :-)
This is by no means an instruction that is meant to be used in a production environment it is merely an effort to share my experiences with setting up an Amazon EC2 server for test purposes.
I hope this shaves a few hours off the installation time for your first Amazon Ubuntu server.
No comments:
Post a Comment